Customizing Tuppers
Avatars
There are three main ways to set an avatar for your tupper:
- The Dashboard (recommended)
- The tul!avatar command on Discord
- Uploading an image while using the tul!register command to create a tupper on Discord
The recommended way is to upload an image on the dashboard. When uploading avatars this way, you get to choose the exact crop and zoom of your image to make sure your tupper looks their best!
If you'd rather not use the dashboard, you can also set an avatar using the tul!avatar chat command. You can either provide an image link, or upload the image as an attachment while running the command instead of pasting a link. Using an attachment is more likely to have good results!
You can choose where your image will be cropped when uploading via tul!avatar!
To do so, simply provide an extra named argument crop:<direction> where <direction> is one of top, bottom, left, right, center, top-left, top-right, bottom-left, or bottom-right. For example:
tul!avatar "Snee" crop:left [url/attachment]
This works with either a link or an attachment!
The minimum recommended resolution for an avatar is 180x180, but 512x512 is optimal.
Finally, you can also upload an image as an attachment while making a tupper with tul!register. This is the quickest way to set an avatar if you already know what image you want to use!
The avatar you choose will be cropped to a square and compressed to a smaller size to fit Discord's requirements. Make sure to choose an image that looks good when cropped to a square!
Avatars uploaded by Premium users get an additional high-quality copy stored for convenient access.
Descriptions
A description is a block of text that shows up when you use the tul!show or tul!list commands to view a tupper. It will also show up when other people use the ❓ proxy action to view info about your tupper. It's a great place to put information about your tupper's personality, backstory, or anything else you want to share!
To set a description for your tupper, either use the Dashboard or the tul!describe command on Discord. For example, to set a description for the tupper "Snee" to "A powerful kobold sorcerer", you could type tul!desc Snee A powerful kobold sorcerer.
Banners
Banners are a Premium feature that allows you to upload large images that show up on the Dashboard when you view your tupper's details, as well as in the tul!show command and profile cards.
Please note that we can't make your banner show up in the profile pop-out when you click on a tupper's name in Discord due to Discord limitations.
We'd love to add this feature in the future, but for now, banners are only visible in the places mentioned above.
To set a banner for your tupper, you can either use the Dashboard or the tul!banner command on Discord.
Banners are displayed at a 10:3 aspect ratio, and we were careful to make sure the avatar always lines up with the banner. Use this if you want the avatar and banner to combine well!
The minimum recommended resolution for a banner is 720x216, but larger resolutions may display better on the Dashboard.
Groups
Groups can be used to organize your tuppers into categories or folders. You can set up groups and add tuppers to them using the Dashboard or the tul!group command on Discord.
Groups have multiple features similar to tuppers! For example:
tul!group create Friends- Create a group named "Friends"tul!group add Friends Snee- Add the tupper "Snee" to the "Friends" grouptul!group describe Friends It's the friends!- Set a description for the "Friends" grouptul!group avatar Friends <link>- Set an avatar for the "Friends" grouptul!group tag Friends (friends)- Set a tag for the "Friends" group
Group Avatars show up on the group's tul!list pages as well as on the Dashboard and in member profile cards!
Group Tags are bits of text that show up at the end of group member names when proxying! You can use them to quickly convey information about your tupper's group or role.
Profile Cards
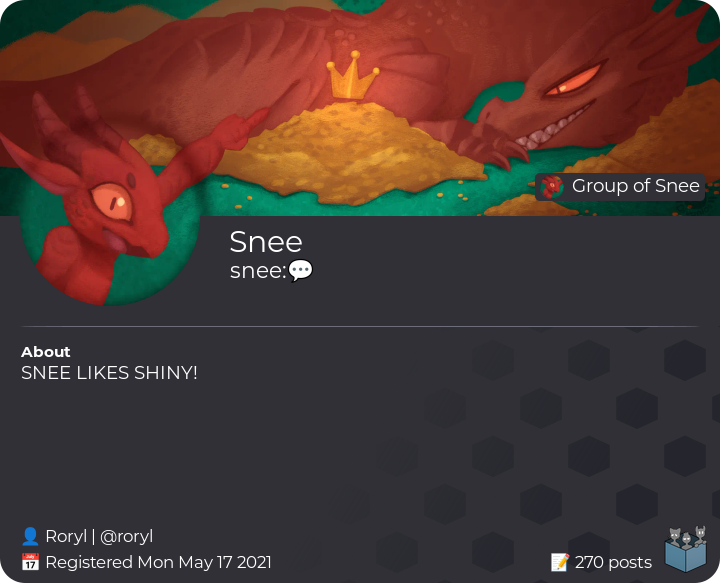
Premium users can generate shareable profile cards for their tuppers using the tul!profile command. Profile cards are a great way to show off your tupper's personality and style!
Here's an example of a profile card generated for Snee using all the available customizations: